Step -1:
Preparations: At first the workingspace should be prepared. Of course you need a soldering-iron (with a fine tip, anything between 0.5 mm and 2 mm) and solder (something like 1 mm). A fine side cutter will be usefull, too.
Step 0:
Completeness: The Kit should contain the following parts:
- 1 x Atmel Tiny2313 Microcontroller
- 1 x TSOP 1738
- 1 x 330 Ohm Resistor
- 1 x 10k Ohm Widerstand
- 1 x 1500 Ohm Resistor
- 2 x 68 Ohm Resistor
- 1 x 100 nano Farad Capacitor
- 2 x 33 pico Farad Capacitor
- 2 x Z3V6 Diode
- 1 x LED
- 1 x mini USB Connector
- 1 x 12 MHz Crystal
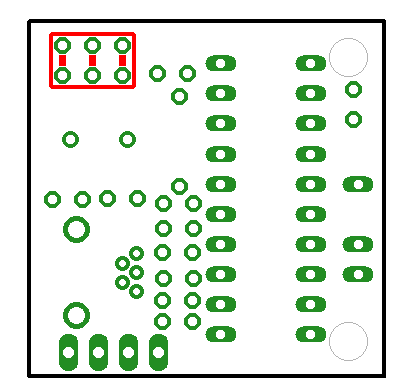
- 1 x 2x3 ISP-Connector
- 1 x 1x4 USB-Connector
Step 1:
Soldering the USB-Connector
Step 2:
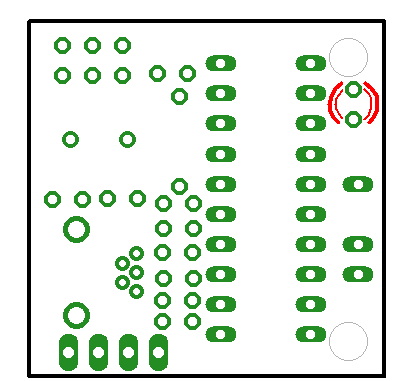
Soldering the crystal
Step 3:
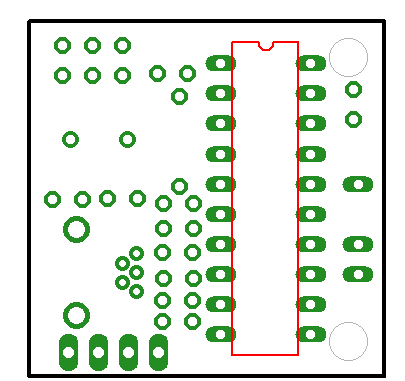
Soldering the Atmel Tiny2313 Microcontroller: Check the correct orientation of the microcontroller, the notch has to point to the edge of the PCB that is opposite to the USB-Connector.
Step 4:
Einlöten der LED: Dabei die richtige Ausrichtung der Diode beachten, die Leuchtdioden werden von der Oberseite so eingesteckt, dass die abgeflachte Seite (die auch das kürzere Bein hat) zur Platinenvorderkante (an der auch der Microcontroller anliegt) zeigt.
Step 5:
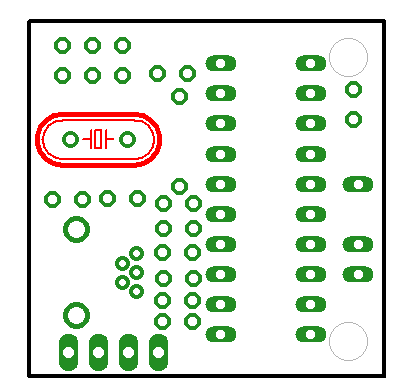
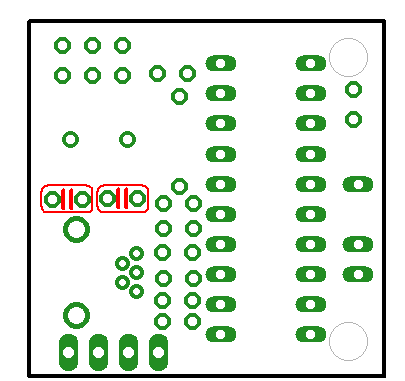
Soldering the 100 nano Farad Capacitors
Step 6:
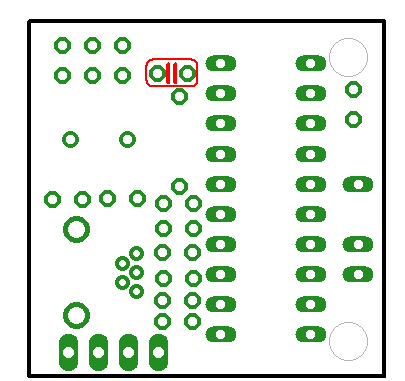
Soldering the 2 33 pico Farad Capacitors
Step 7:
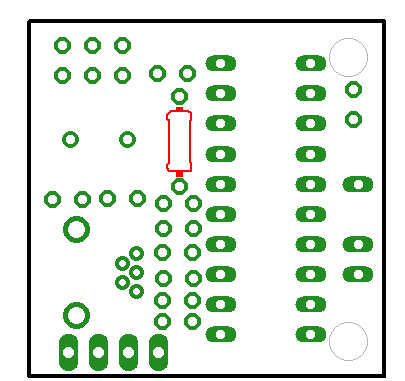
Soldering the 10k Ohm Resistor
Step 8:
Soldering the 2 68 Ohm Resistors
Step 9:
Soldering the 1500 Ohm Resistor

Step 10:
Soldering the 330 Ohm Resistor
Step 11:
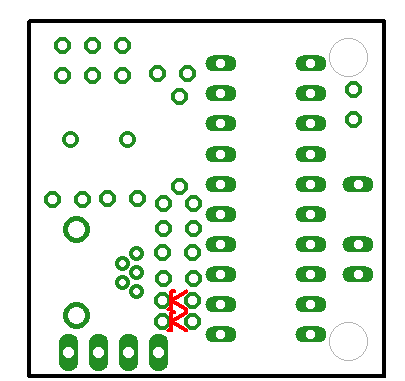
Soldering the 2 3V6 Z-Diodes: Check the correct orientation of the the diodes, the rings on the cases of the diodes have to point in the same direction as the USB-Connector.
Step 12:
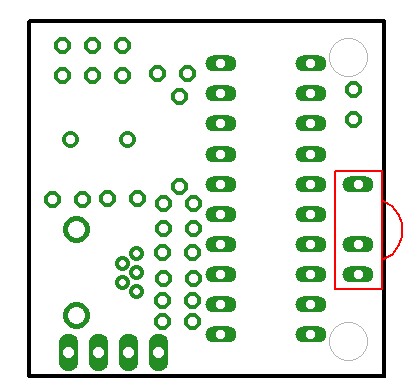
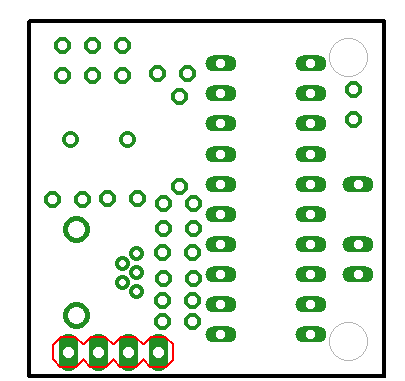
Soldering the USB pinheader
Step 13:
Soldering the ISP-Connector
Step 14:
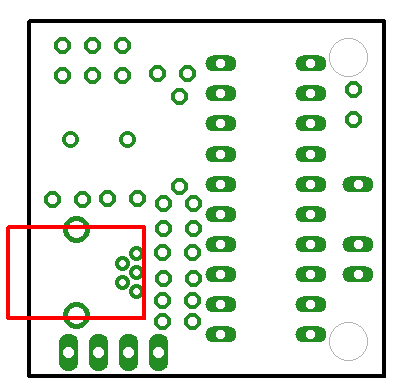
Soldering the TSOP 1738